I have a table booked for next years comic-con to sell some stuff and hopefully gain some interest in my props. As I've recently become addicted to Team Fortress 2, I decided to build a full-size mini-sentry to display there.
As this prop will be representing me at the convention I'm pulling out all the stops to make it the best it can possibly be. Not only will it be a 1:1 scale sentry but it will be fully automated, switchable to radio control via a separate Wrangler prop AND will be collapsible to make transporting it to the venue as easy as possible.
--------------------------------------------------------------------
Build:
I started by taking some in-game screenshots of the sentry next to characters and other objects to estimate the size of it. Once I has an approximate size I used Valve's SDK to view the sentrys game model and draw up some simple blue prints.

At this point I decided to work on the electronics first. This will allow me to build the sentry around the electronics and ensure everything fits well. For this I used;
- Arduino Uno
- Arduino WaveShield for sound effects
- 2 large servos for aiming and firing animation
- 3 sonic range finders for targeting and tracking
- Misc parts such as LED's, cables, resistors etc
The cost of all of these weren't cheap but hopefully it'll be worth the bits.
After a couple of weeks I had this miniature prototype up and running:
Anybody familiar with the game will notice that this sentry behaves just as it does in-game.
It starts by sweeping back and forth, constantly scanning until it finds a object. When an object is detected the sentry targets it and switches to "tracking" mode.
Whilst in tracking mode, the sentry uses its left and right range finders to sense if the object is moving left or right and adjusts itself to keep it in view. If the object is detected by the central range finder, the sentry knows it's in its "firing line" and opens fire (will move the barrel, led's will flash for firing effects and sound effects will play).
Sadly my central range finder broke before this video was taken but it can still target objects without it, it's just unable to fire. Guess what I want for xmas...
-------------------------------------------------------------------------
The programming is almost complete, I just need to program the Wrangler to control the sentry.
For those unfamiliar with the Wrangler, it's a device in Team Fortress 2 which allows you to take manual control of your sentry gun.
It also looks strikingly like the controller of an Atari 2600. This makes building this prop a whole lot easier.

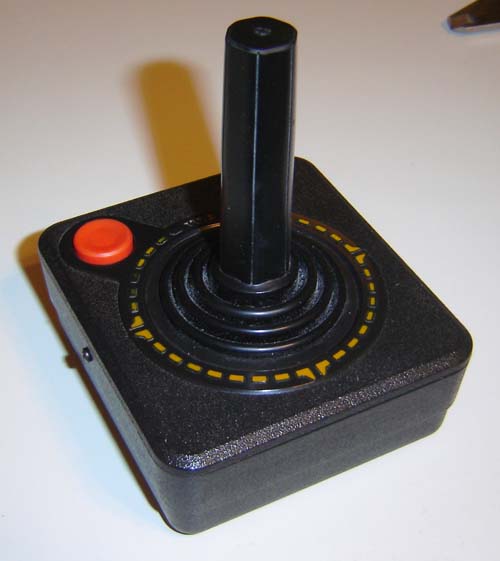
I did a quick search on ebay and bought an Atari 2600 joystick that will serve as the main body for the Wrangler. The body of it is large enough for an Arduino board and battery to power it.
As the Wrangler will only be a couple of feet away from the sentry, and there will be a lot of radio interference at the convention, I decided that infrared communication was the way to go.
It's simple, cheap and perfect for short-range wireless communication.
While waiting for materials to arrive I started coding the 2nd Arduino that will be inside the Wrangler.
The Atari joystick has a different wire for each direction; Up, Down, Left, Right and the button.
Before I can begin sending signals over infrared, I first need to find out which wire is which.
To do this I wire it directly into the sentrys circuit and create a simple program to read input from the joystick and move the servo accordingly.
After swapping a few wires over I had the joysticks left and right directly controlling the sentry:
Now it's a simple case of sending the input data from the joystick to the sentry via serial over infrared.
-------------------------------------------------------------------------
Done!
The Wrangler (the Atari controller) is now communicating wirelessly with the Sentry.
The sentry has it's normal automatic mode, but when a button is pressed on the Wrangler you take full control.
Pressing the button again returns the Sentry to autopilot.
You may notice the Sentry suddenly looks a little different too.
Previously for prototyping this I had a attatched the range-finding sensors to the servo with tape, but with the arrival of my Solidoodle 3d printer I whipped up a mount for them in about 5 minutes. Ah the future~
The blank space in the middle of the range-finder mount is for the central sensor that will detect "line of fire", which is still in the mail somewhere. Until it arrives my tiny sentry is harmless.
Next I copied the code from the prototype Wrangler over to an Arduino Mini as this is much smaller than the Arduino Uno, cheaper AND allows me to embed it within the Wrangler. The 9v battery which powers it will be consealed within the handle and the IR LED's will be in the small space left where the wire used to exit the controller.
Luckily everything fits really well and looks normal from outside, you'd never guess it's filled with wifi tech!
-------------------------------------------------------------------------
Here's the almost finished Wrangler.
As mentioned earlier, the electronics are 100% completed and inside the Wrangler.
All it needs is the front metal bar, satilite dish and wire. The front bar is acutally done, but wasn't at the time of this photo.
After testing with it, the range seems to be 5+ meters, which is a lot more than I'd first expected.
Just hope it performs as well at the convention!

-------------------------------------------------------------------------
The sentry is currently on hold while I work on some commissioned props.
One is a budget Portal Gun, so I'll post a build log of that for now.
-------------------------------------------------------------------------
Done!
The Wrangler (the Atari controller) is now communicating wirelessly with the Sentry.
The sentry has it's normal automatic mode, but when a button is pressed on the Wrangler you take full control.
Pressing the button again returns the Sentry to autopilot.
You may notice the Sentry suddenly looks a little different too.
Previously for prototyping this I had a attatched the range-finding sensors to the servo with tape, but with the arrival of my Solidoodle 3d printer I whipped up a mount for them in about 5 minutes. Ah the future~
The blank space in the middle of the range-finder mount is for the central sensor that will detect "line of fire", which is still in the mail somewhere. Until it arrives my tiny sentry is harmless.
Next I copied the code from the prototype Wrangler over to an Arduino Mini as this is much smaller than the Arduino Uno, cheaper AND allows me to embed it within the Wrangler. The 9v battery which powers it will be consealed within the handle and the IR LED's will be in the small space left where the wire used to exit the controller.
Luckily everything fits really well and looks normal from outside, you'd never guess it's filled with wifi tech!
-------------------------------------------------------------------------
Here's the almost finished Wrangler.
As mentioned earlier, the electronics are 100% completed and inside the Wrangler.
All it needs is the front metal bar, satilite dish and wire. The front bar is acutally done, but wasn't at the time of this photo.
After testing with it, the range seems to be 5+ meters, which is a lot more than I'd first expected.
Just hope it performs as well at the convention!

-------------------------------------------------------------------------
The sentry is currently on hold while I work on some commissioned props.
One is a budget Portal Gun, so I'll post a build log of that for now.